The Holbrook Explorer

Top 5 Photography Tips for Beginners
Top 5 Photography Tips for Beginners
If you're new to photography, don't fret. Everyone has to start somewhere, and even experts in the field always have more to learn. The best advice is to practice often, ask questions and think outside the box, but if you follow these five basic tips for beginners, you'll be shooting like a pro in no time.
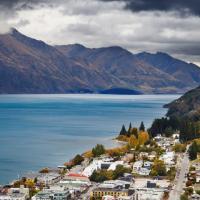
1. Know the best times of day to shoot. For ambient light, the best time of day to shoot outside is sunrise, sunset or any time fairly close. The worst time of day is noon because that is when the sun is the highest in the sky and casts shadows in unwanted areas, especially on human subjects. If you absolutely must shoot at this time, find a shady area to filter the ambient light so that it is less harsh.
 Photo by Pelin Karaca
2. Be careful not to cut out any limbs or extremities from your shot. If you're taking a full-body shot of a person or animal, even if it's a detail/close-up shot, make sure all key components are still present within the frame. This means things like fingertips, the edge of a shoe and a hairline should be visible. Subjects should generally take up 70 percent of the photo, but not so much that they are cut from the background. Practice framing your photos so that there is enough, but not too much, space around your subject.
 Photo by Martin Van Lokven
3. Practice the "rule of thirds." This is not really a photo law, but more of a guideline. For those who are unfamiliar with it, it basically a visual aid of four imagined perpendicular lines in the form of a straightened hashtag (#). If you pinpoint your subject of the photo on one of those intersecting points, overall shots tend to look more appealing when the focus is off-center. The exception is street-style fashion, but generally, you want to aim to have your subject a little to the left, right, top, or bottom to give some context to the background of your shot.
 Photo by Lisa Palmese-Graubard
4. Sometimes less is more. A clean, minimalistic approach can be more effective than having several well-composed elements in one photo. A shot can be distracting if there is too much to look at, and you want there to be a clear focus. Also, things like a cluttered background or a telephone pole sticking out of your subject's head are hard to miss but easy to catch if you're aware and looking to eliminate them while shooting.
 Photo by Reinier Munguia
5. Try out different angles. Get on one knee (yes, kneel on the ground—lay on it if you have to) and shoot from below. Shoot from above. Shoot through a fence. Framing and foreground in images (a.k.a. "layers," such as tufts of grass at the bottom of a frame from a ground shot) really take your images to the next level and make them that much more creative. Composition is key.
 Photo by Todd Gustafson, Gustafson Photo Safari
Decoding jargon: If you want to learn about some photography jargon you might have heard, especially in the context of manual settings on digital SLR cameras, here are a few common phrases and what they mean.
- Aperture: Like pupils in human eyes, aperture is the size of the opening, or hole, that lets light in. It is measured in f-numbers, such as f/1.4 or f/5.6. The lower the number, the better the aperture, which allows to focus on subjects or specific points in a photograph and blur the background, as in depth of field. Adjusting aperture to a larger number is ideal for landscapes to get more in focus.
- ISO: This refers to film speed and light sensitivity. Depending on how much light you have outside or indoors, you need to adjust ISO to match natural settings or manipulate it how you'd like. Lower ISO margins, like 100 or 200, are best for sunny/well-lit areas, 400 is a good standard for most situations, and higher margins, like 1600 or 3200 are best for night and dark areas. So, low ISO for lots of light, and high ISO for little light.
- Shutter speed: Measured in seconds or fractions of seconds, shutter speed refers to the duration of time you allow an image to be exposed to light. So, for instance, if you had a shutter speed of 1/60, the image would be captured in one-sixtieth of a second. The faster the shutter speed, the sharper the image, which is useful for action, sports and wildlife photography. Conversely, if you had a shutter speed of 15", the 15-second exposure would allow for more blur and slow movement, which is ideal for landscapes and night photography techniques. However, if a fraction of time is too short or long, a photo may become dark or overexposed, respectively.
This blog post was originally published May 2016; updated July 2021


